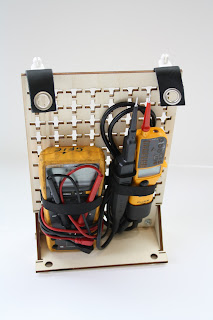
In this movie you can see how the toolbox will be used in the workspace.
MPO: Toolbox (Groep 6)
zondag 4 juni 2017
Movie toolbox user expierence
In this movie you can see how the toolbox will be used in the workspace.
dinsdag 23 mei 2017
maandag 22 mei 2017
zondag 21 mei 2017
DIY 3D & Nest
We first made the DIY model in 3D. Then we converted it to 2D. to make maximal use of the wooden plates we organized the 2d planes so there is a minimal waste of wood.
Small plate:
Big Plate:
Handle:
These are the nest plans we used for the laser cutter.
Small plate:
Big Plate:
Handle:
These are the nest plans we used for the laser cutter.
Big plate and small plate.
Two small plates and handle.
two small plates and second part of the previous 2 plates.
woensdag 10 mei 2017
Consult 9/5
try to design the injection molded part without the undercut. By changing the lock system to the outside. Use the injection molding script to simulate the part in NX. the handle part can be a solid piece.
For the middel production we use the sheet metal production. It is better to use round form for ponsing. also use the part for the handle.
The diy content is good. no problem to use standard components.
CES: used ABS is oke, try to compare with PP and PE reinforced with fiberglass.
dinsdag 9 mei 2017
Material Injection Molding
The material chose for injection molding is: ABS with 30% fibreglass.
The most important factors were the price, Strenght and the compatibility with injection molding.
maandag 8 mei 2017
DIY Cad
These are the basic drawings for de DIY model. The snap-connections still need to be drawn. Then we can proceed to make the Lasercut drawings and make the prototype.
Tool plate:
On the plate we will place the tools. This is the large version. There is also a smaller version which is half the length. (20cm)
The snap-connections will be on the side.
The crosses are 25 mm apart. in these crosses come another part, the sliders. On the sliders we will connect a flexible piece of fabric. This fabric will hold the tool and the Sliders will press the fabric against the back of the plate.
The handle part is a more difficult part so we still need to optimize the design.
Abonneren op:
Reacties (Atom)


